AI Room Design from Photo: 7-Step Guide for 2026
AI room design from photo begins before any image reaches the software. At 7:10 on a cloudy Saturday morning, a homeowner photographs a narrow living room from the doorway; the sofa looks straight, but a half-hidden balcony opening and a wide-angle distortion make the proposed makeover visually polished yet spatially misleading.
The useful lesson is counterintuitive: a prettier input is not always a better input. A plain, evenly lit photograph that exposes the room’s boundaries can communicate more than a dramatic image with deep shadows, cropped openings, or decorative clutter.
This guide treats AI output as a design conversation rather than a purchase order. You will learn to capture evidence, declare constraints, compare alternatives, inspect circulation, diagnose visual failures, and translate one chosen direction into a brief that a designer, architect, contractor, or presentation team can review.
Want to test the process while the room is in front of you? Open Zlendo Room Styler, prepare the photograph with the checklist below, and keep the original image beside every generated version.
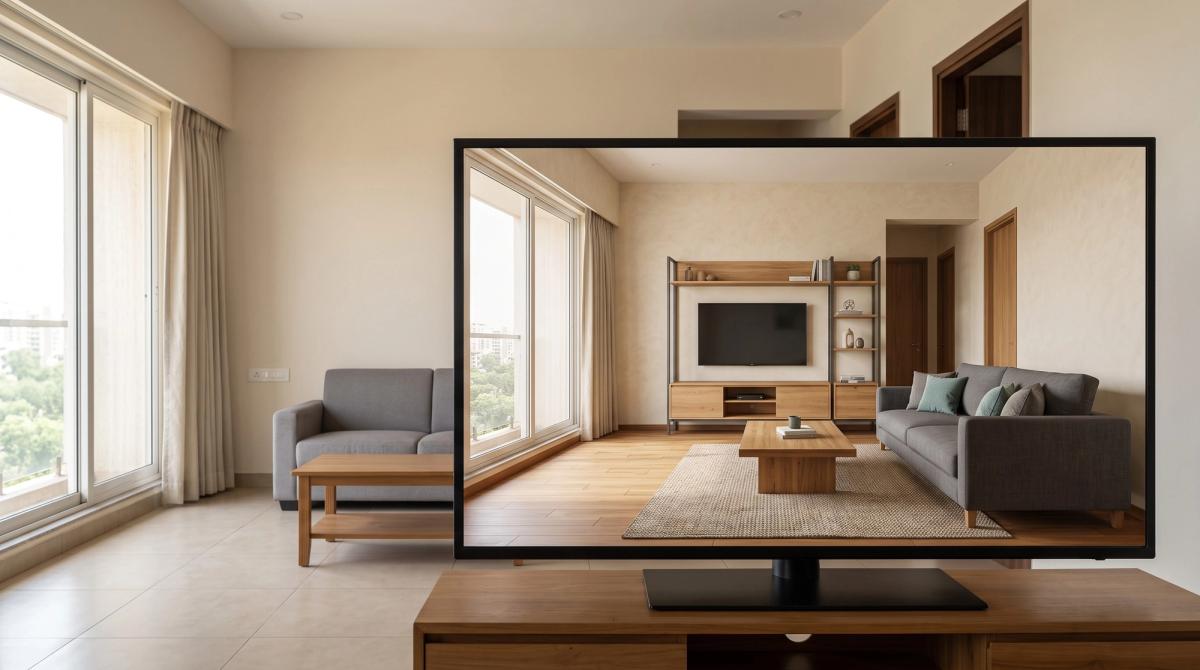
Why AI Room Design from Photo Succeeds Before the Upload
Photograph boundaries, not merely furniture
Stand where the camera can see the junctions that explain the room: wall to floor, wall to ceiling, and one wall meeting another. Keep the lens level. Include full door and window openings whenever possible, because a cropped threshold can disappear from the redesign even though people still need to pass through it.
Do not hide awkward features. A beam, switchboard, air-conditioner, radiator, column, low sill, or projecting cabinet may control what can fit. If one frame cannot show opposite walls, capture additional views from stable positions and name them clearly—for example, “doorway facing balcony” and “balcony facing doorway.”
The pre-upload photo checklist
- Open curtains and switch on stable room lighting without creating harsh glare.
- Remove temporary clutter, but retain fixed or must-keep objects.
- Capture the floor edges, ceiling line, doors, windows, columns, and built-ins.
- Hold the camera level around normal eye height; avoid panoramic distortion.
- Take one primary composition view plus supporting views of hidden boundaries.
- Record measurements separately instead of assuming the photograph contains them.
- Save an untouched original for side-by-side checking.
What the image cannot certify
A single photograph does not certify dimensions, concealed services, structural capacity, material stock, or legal compliance. Zlendo Realty’s Terms of Service explains that generated renderings and visualisations are illustrative and may not accurately represent construction conditions, dimensions, finishes, lighting, material availability, structural feasibility, regulatory compliance, or final build quality.
Spatial truth and visual inspiration are related, but they are not interchangeable. Preserve both by keeping measured information outside the image-generation loop.
The Constraint-First Input System for Rooms That Must Still Function
Separate fixed facts from creative preferences
Start with two columns. The first contains constraints: openings, fixed joinery, electrical points, retained furniture, rental restrictions, accessibility needs, and circulation paths. The second contains preferences: palette, atmosphere, furniture character, storage appearance, textiles, art, and styling density.
Here’s the counterintuitive part: more freedom can produce a less useful result. If the system treats a door as optional or replaces a treasured dining table, the image may look cohesive while solving the wrong room.
Write a keep, remove, explore statement
Use direct language that can survive handoffs. Write “keep teak display cabinet and both windows,” “remove loose plastic drawers,” and “explore a compact reading chair without narrowing the balcony route.” Avoid vague instructions such as “make it luxurious,” which provide mood but no operational boundary.
According to its official product page, Zlendo Room Styler lets users select an existing room model or upload a photo of an empty space, choose an interior style or custom mood board, receive an AI-arranged furniture and decor composition, adjust individual items, and generate a high-quality photorealistic image. Those controls make the constraint statement useful during refinement, not merely at upload.
Use this reusable design-brief template
- Room and users: [room type], used by [people and activities].
- Must stay: [openings, fixtures, furniture, finishes, services].
- May change: [movable pieces, paint, lighting, textiles, decor].
- Must remain clear: [door swing, walkway, cabinet access, window use].
- Desired character: [three precise adjectives and reference cues].
- Storage and function: [objects, seating, work, media, dining needs].
- Do not introduce: [blocked openings, structural changes, unwanted materials].
Empty, Furnished, Narrow, Dark or Multi-View: Which Input Wins?
There is no universal winner. The strongest input is the one that reveals the decision you need to make while minimizing ambiguity. An empty room clarifies boundaries; a furnished room communicates scale cues and retained objects; supporting views expose what the hero photograph conceals.
| Input condition | What it communicates well | Main risk | Best preparation |
|---|---|---|---|
| Empty room | Visible floor and wall boundaries | Weak scale cues or generic furnishing | Add measured notes and identify every opening |
| Furnished room | Use patterns and must-keep pieces | Clutter may be interpreted as intentional | Remove temporary objects and label retained items |
| Narrow room | Depth and end-wall relationship | Lens distortion can exaggerate width | Keep the camera level and add a reverse view |
| Dark room | Existing mood and difficult corners | Boundaries may disappear in shadow | Use soft, even illumination without blown windows |
| Multi-view room | Hidden walls, openings, and circulation | Inconsistent viewpoints may confuse comparison | Name each view and use one as the primary frame |
Method A—uploading the most attractive photograph—wins for presentation only when the room is already legible. Method B—selecting the photograph with the clearest architectural evidence—wins for redesign decisions. If no frame shows enough information, use multiple references and move into measured planning before committing to placement.
The Seven-Step Route from Camera Frame to Practical Brief
Build concepts without mistaking them for plans
- Capture: photograph the primary view and hidden boundaries using the checklist.
- Record: write measured room, opening, and retained-item dimensions separately.
- Constrain: state what must stay, what may move, and what must remain clear.
- Direct: choose a defined style or mood board rather than stacking contradictory labels.
- Generate: create distinct variants that test one major idea at a time.
- Compare: inspect openings, circulation, scale, lighting logic, and retained objects.
- Translate: turn the preferred concept into a review brief with open questions.
Change one decision between variants. Compare a low media console with full-height storage, or warm ivory walls with muted mineral grey. If furniture layout, lighting, palette, and architecture all change together, you cannot identify which choice improved the room.
Move from image logic to measured logic
Once a composition feels promising, rebuild its relationships with actual dimensions. Zlendo’s floor-planning workspace provides a more suitable next context for measured space planning than relying on visual perspective alone.
If the project already has a model, room sketch, or floor plan, Zlendo Realty’s realistic-render workflow describes uploading one of those inputs, selecting a reference style or text description, and exporting a high-resolution 4K render. That route serves a different purpose: developing a controlled visual from structured design information.
Concept Image vs Measured Plan: The Decision Boundary
What each output can responsibly do
An AI interior design from photo can explore atmosphere, broad furniture character, palette relationships, decor density, and a possible composition. It can empower a faster conversation because participants can react to something visible rather than interpret adjectives differently.
A measured space plan tests dimensions and spatial relationships. Construction documentation communicates coordinated work. Regulatory approval follows applicable processes, while professional advice evaluates the specific site, design, structure, services, materials, safety, and execution conditions. One attractive image cannot absorb those responsibilities.
Why Indian projects require a separate compliance track
The Bureau of Indian Standards describes the National Building Code of India 2016 as a model code covering general building requirements, fire and life safety, materials, structural design, construction safety, building services, sustainability, and asset and facility management. This breadth explains why visual generation cannot replace code review or qualified professional judgment.
Do not ask a concept image to approve removed walls, altered exits, electrical changes, wet-area relocation, load-bearing work, or life-safety decisions. Escalate those questions to suitable professionals and the applicable approval pathway.
A decision checklist before anyone buys or builds
- Do the measured dimensions support the proposed furniture arrangement?
- Can every door, window, drawer, and cabinet operate?
- Are circulation paths usable for the room’s actual occupants?
- Have electrical, lighting, ventilation, plumbing, and structural assumptions been reviewed?
- Are finishes and products available and suitable for their intended use?
- Does the proposal need landlord, society, authority, or professional approval?
- Has the team marked every unresolved item rather than treating the render as proof?
When the Makeover Looks Brilliant but the Room Is Wrong
Diagnose the failure before regenerating
A missing window or door: the opening was cropped, shadowed, or overwhelmed by instructions. Reframe the room, explicitly preserve the opening, and reject every variant that alters it.
Furniture appears implausibly small: perspective supplied poor scale evidence. Add measured furniture and wall dimensions to the working brief, then verify the arrangement in a plan rather than trusting apparent clearance.
The style drifts between variants: the direction contains competing signals. Replace “minimal, royal, rustic, futuristic” with a controlled material palette, a defined furniture profile, and a short mood statement.
The result copies clutter: the input failed to distinguish temporary objects from retained items. Clear the frame physically where possible; otherwise list what must disappear and what must remain.
Know when another medium is stronger
A still image cannot explain every sequence of movement. After validating the model and layout, a virtual walkthrough can communicate transitions between viewpoints. Use it to review the experience, not to bypass measurements or technical coordination.
The breakthrough happens when teams stop asking, “Is this image impressive?” and start asking, “Which decision does this image resolve?” If it resolves none, regenerate with a narrower question or move to a drawing, schedule, sample, or professional review.
Questions People Ask Before Uploading a Room Photo
Can I redesign a furnished room from a single photo?
You can explore a visual direction, but one frame may conceal walls, openings, and circulation. Remove temporary clutter, identify every must-keep item, capture supporting angles, and record measurements separately. Treat the result as a concept for review rather than evidence that each object fits.
Should I upload a wide-angle image of a small room?
Use a wide view only when it does not visibly bend walls or exaggerate floor width. Keep the camera level and compare the image with what your eyes see. For a narrow room, a restrained primary view plus a reverse photograph usually communicates boundaries more honestly.
How do I tell the AI which furniture must stay?
Name each retained piece by material, colour, position, and function. For example: “Keep the teak cabinet against the north wall and preserve access to both doors.” Photograph it clearly, then confirm its measured width, depth, and height in the practical brief.
Can a generated room image replace an interior designer?
No. A concept image can focus discussion around mood and composition, while a designer can evaluate requirements, dimensions, materials, detailing, coordination, and site conditions. Construction, structural, services, safety, and approval decisions require the appropriate documentation and professional review.
Why did the redesign remove my window?
The window may have been cropped, dark, partly covered, or insufficiently identified as fixed. Upload a clearer image, state that its location and dimensions must remain unchanged, and compare the output against the original. Reject the concept if the architectural boundary still changes.
How many design variants should I compare?
Generate enough variants to test distinct decisions without creating a random gallery. Change one major variable per round—such as storage height, seating orientation, or palette—then record what improved. A smaller controlled comparison usually teaches more than many unrelated images.
Can I use the generated furniture as a shopping list?
Not directly. Visual furniture may represent a category rather than an available product, and apparent dimensions may be unreliable. Convert each desired piece into a specification covering measured size, material, colour, function, quantity, and placement before checking real products, samples, availability, and suitability.
What should I send to my architect or contractor?
Send the original photographs, measured survey or verified dimensions, preferred concept, rejected alternatives, constraint list, retained-item details, material references, and unresolved questions. Label the generated image “visual concept.” Do not present it as a construction drawing, approval document, or verified specification.
The 2026 Move: Convert Visual Excitement into a Reviewable Decision
AI room design from photo works best as the opening layer of a disciplined acquisition process: photograph honestly, define constraints, generate focused alternatives, validate the room beyond the pixels, and write a practical brief. The output should sharpen the next decision—not conceal uncertainty beneath polished lighting.
Before closing the browser, select one preferred concept and write why it won. Then mark each element as “visual preference,” “dimension to verify,” “product to source,” “technical review,” or “approval question.” That short classification prevents inspiration from silently becoming an instruction to build.
Ready to create a controlled first concept? Upload a prepared room image to Zlendo Room Styler, state every must-keep feature, compare purposeful variants, and carry the chosen direction into measured and professional review before purchasing or construction.
Reshma Shree
A passionate content writer and digital marketer skilled in creating engaging, SEO-driven content that boosts online visibility and brand growth.