Convert 2D Floor Plan to 3D Online: Definitive 2026 Guide
Convert 2D floor plan to 3D online, and the decisive moment happens before any wall rises on screen. A homeowner places a slightly creased plan beside a laptop, checks one blurred dimension, then notices that a doorway arc overlaps the wall. Fixing that small ambiguity now can prevent a visibly distorted 3D room later.
The smartest workflow is not “upload and accept.” It is prepare, generate, inspect, edit, and choose the right presentation or export path. Your source may be a paper sketch, JPG, PNG, PDF, or digitally drawn plan; what matters is whether walls, openings, scale clues, and room relationships remain legible.
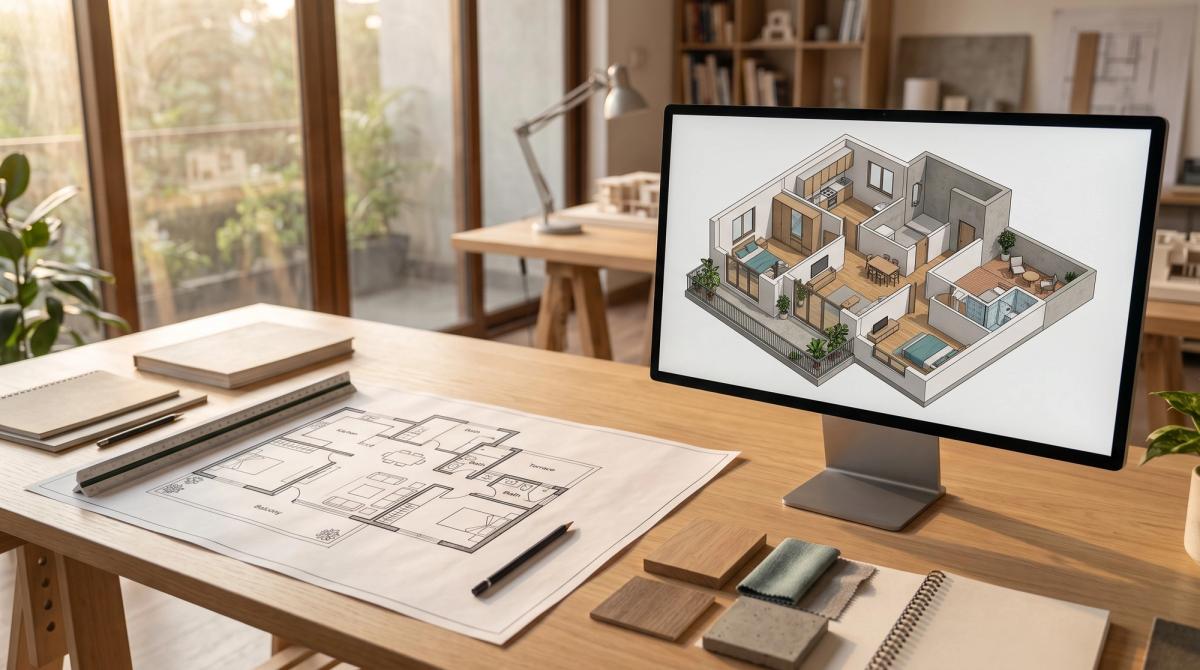
If your plan is ready, test it through Zlendo Realty’s 2D-to-3D workflow. If it still needs correction, keep reading before uploading.
Why Convert 2D Floor Plan to 3D Online Only After a Plan Audit?
A converter interprets what the drawing communicates
A floor plan can look obvious to its owner while remaining ambiguous to a conversion system. Human eyes infer that a pale gap represents a door or that two nearly touching lines form one wall. Software needs cleaner visual evidence.
Start by separating three ideas: visible geometry, scale information, and design intent. Geometry describes walls and openings. Scale establishes proportional size. Design intent explains what each space should become, including circulation, furniture zones, finishes, and presentation priorities.
The input-readiness checklist
Inspect the source at high zoom rather than judging it from a full-page view. A crisp perimeter can hide broken internal partitions, faint window lines, handwritten corrections, or scanning shadows.
- Confirm that exterior and interior walls remain continuously visible.
- Identify every door, window, stair, column, and open passage.
- Find at least one dependable dimension or other scale reference.
- Remove unrelated notes, stamps, folds, shadows, and background objects where practical.
- Check whether room names cover structural lines.
- Mark uncertain areas for manual review after generation.
For a photographed paper sketch, shoot directly from above. Keep all page edges as parallel as possible and use even light. A tilted camera can make one side appear wider, while hard shadows can resemble walls.
Clean without redesigning
Increase clarity carefully. Cropping empty margins and improving contrast can expose wall lines, but aggressive processing may erase thin windows or merge nearby edges. Preserve an untouched original beside the cleaned file so you can compare disputed details later.
When the drawing is too rough for dependable interpretation, rebuild its geometry rather than repeatedly filtering the image. Zlendo Realty’s floor planner documentation states that its users can begin with a blank canvas or import a rough sketch, then work with wall snapping, auto-dimensioning, multiple stories, 3D preview, and CAD-format export.
Sketch vs Image vs PDF vs CAD: Which Input Preserves Intent?
The best starting format is the one that communicates the plan clearly—not necessarily the one with the most technical filename. File support varies between products, so verify accepted formats before committing to a workflow. When direct support is uncertain, export a clean reference image or PDF if the chosen product accepts it.
| Input | Primary strength | Inspect before conversion | Practical route |
|---|---|---|---|
| Paper sketch | Fast capture of spatial intent | Perspective, faint lines, missing dimensions | Photograph or scan cleanly; redraw unclear geometry |
| JPG or PNG | Easy visual reference | Resolution, compression, shadows, cropped edges | Clean the image and retain the original |
| Can preserve a complete sheet layout | Whether dimensions and lines are actually legible | Check tool support; export a clear page image when appropriate | |
| CAD-origin plan | May contain precisely drafted geometry | Layers, units, references, and destination support | Confirm import compatibility or create a clean PDF/image reference |
Here’s the counterintuitive part: a tidy image can be more actionable than a complicated source file that the destination cannot interpret. CAD origin does not guarantee direct CAD import. Likewise, a PDF is a container, not proof that dimensions, scale, or editable geometry exist inside it.
The 8-Stage Plan-to-Model Control Loop
1. Preserve the source and define the goal
Duplicate the original before editing. Then decide whether you need an editable concept, a furnished presentation, realistic still images, a walkthrough, or a file for another compatible application. This decision determines how much detail you must validate.
2. Isolate the drawing
Crop the sheet without removing exterior walls, dimensions, north indicators, level labels, or stair references. Flatten perspective in photographed plans. Rotate the drawing so its principal walls appear horizontal and vertical where that matches the source.
3. Establish a scale reference
Locate a clearly written dimension whose endpoints you can identify. Do not estimate scale from familiar-looking furniture or assume a doorway has a particular width. If no dependable measurement exists, treat the result as a proportional concept until verified information becomes available.
4. Clarify walls and openings
Trace over broken wall segments only when the intended connection is known. Distinguish windows from door gaps, openings from erased lines, and columns from furniture symbols. Keep a short uncertainty list instead of silently guessing.
5. Upload or reconstruct
Send the prepared plan through a compatible converter. Zlendo Realty describes its flat-plan conversion process as using automatic wall detection and 3D generation to produce a structured environment and client-ready output. These are stated Zlendo product capabilities, not promises about every converter.
If automatic interpretation cannot resolve the drawing, reconstruct the plan manually with a floor-planning tool. The goal is controlled geometry, not loyalty to one input method. Keep the source visible while redrawing so corrections remain traceable.
6. Compare the 3D shell with the 2D source
Begin with the perimeter. Then inspect room sequence, wall intersections, openings, stairs, and floor changes. Use a top or orthographic-style view when available because dramatic perspective can disguise alignment errors.
7. Edit finishes after geometry passes
Apply materials, colors, fixtures, and furniture only after the shell survives inspection. A polished texture can distract from a misplaced partition. For focused interior experimentation, continue with Zlendo’s room styling workflow after confirming the underlying layout.
8. Match the output to its audience
Homeowners may need an editable spatial concept. A property presentation team may prefer composed views. Designers may require a handoff into another workflow. Name versions clearly so a conceptual model never becomes confused with approved construction documentation.
Control rule: validate structure before decoration, and validate decoration before presentation.
Ready to convert floor plan image to 3D model without losing sight of the source? Start with Zlendo’s 2D-to-3D product page, then use the checks below before approving the result.
Run This Quality-Control Pass Before Styling a Single Room
Geometry and scale
Place the original and generated model side by side. Follow the external boundary in one continuous loop. Then inspect each internal wall from one junction to the next, looking for offsets, accidental gaps, duplicated segments, or merged rooms.
- Does the perimeter match every turn and recess?
- Do known dimensions correspond to the intended walls?
- Are wall thicknesses consistent with the source?
- Are room proportions credible relative to verified scale information?
- Are separate levels assigned correctly?
Openings and movement
Trace a route from the entrance through every accessible room. Check that doors connect the intended spaces, swing in the represented direction when shown, and do not occupy window locations. Review stairs as linked elements rather than decorative objects.
- Verify door count, position, orientation, and destination.
- Compare window groups and spacing with the plan.
- Inspect corridors, landings, balconies, and open passages.
- Confirm columns and shafts were not interpreted as furniture or walls.
Model meaning
A visually accurate shell can still carry the wrong meaning. Confirm room labels, floor assignments, material zones, ceiling assumptions, and any spaces intentionally left open. Record decisions that came from interpretation rather than explicit information.
The breakthrough happens when validation becomes a repeatable pass, not a final glance. Save a clean geometry version before furnishing. If later styling reveals an issue, you can correct the shell without dismantling the entire presentation.
When the 3D Model Looks Wrong: Diagnose the Signal, Not the Style
Walls disappear or fuse together
Likely causes include faint lines, low contrast, overlapping notes, or narrow gaps that resemble openings. Return to the source and inspect the exact area. Restore missing line continuity only when the original intent supports it, then regenerate or correct the wall manually.
The house appears stretched
Check camera perspective in the source image and verify the scale reference. A photograph taken from an angle can taper the page. A misread dimension can also distort the model even when wall detection appears visually neat.
Doors become windows—or vanish
Door arcs, wall gaps, and window marks may be faint or stylistically unusual. Compare the generated opening schedule visually against the source, room by room. Correct opening type, width, placement, and orientation before adding furnishings.
Furniture and annotations become geometry
Heavy furniture outlines, hatch patterns, stamps, and handwritten notes can compete with structural lines. Create a cleaner reference that suppresses nonstructural marks without erasing walls. If uncertainty remains, reconstruct that zone manually rather than treating automated output as authoritative.
Multiple floors fail to align
Review each level separately, then compare shared cores such as stairs, shafts, columns, and exterior boundaries. Do not assume stacked drawings use identical placement or scale. Establish known alignment references and document any deliberate offsets.
Do not “fix” geometric errors with camera angles, dark materials, or oversized furniture. Those choices conceal defects rather than resolve them. Correct the plan logic first; presentation quality follows.
Editable Model vs Render vs Walkthrough: Choose the Deliverable Backward
A model intended for ongoing design decisions should preserve editable walls, openings, room assignments, and reusable scene structure where the selected platform supports them. A presentation image instead prioritizes materials, lighting, composition, and visual clarity. These outputs serve different decisions.
For polished stills, move a verified model into Zlendo’s realistic rendering workflow. When spatial sequence matters more than a single camera view, consider a virtual walkthrough presentation. Neither format should disguise unresolved geometry.
For cross-platform planning, buildingSMART identifies Industry Foundation Classes, or IFC, as an open global standard published as ISO 16739 for standardized digital descriptions of built assets. It is vendor-neutral and supports machine-interpretable information and workflow automation. Confirm that both sending and receiving applications support the specific exchange you require.
A conceptual visualization does not replace architectural, structural, code, permit, or licensed-professional review. Construction documentation carries different requirements and responsibilities. Label conceptual exports plainly and obtain appropriate professional review before using information for procurement or building work.
The 2026 Advantage: Fewer Blind Conversions, Better Design Decisions
The strongest AI floor plan converter workflow will not be the one that removes every human checkpoint. It will be the one that makes uncertainty visible, keeps source geometry traceable, and lets users correct interpretation before presentation layers hide it.
A second surprising insight follows: photorealism is not the first quality benchmark. Correspondence is. The generated home should match the source plan’s walls, openings, scale clues, levels, and circulation before it earns polished lighting or premium finishes.
Teams can support that discipline with version names such as source-cleaned, geometry-reviewed, openings-checked, styled, and presentation-ready. This simple chain clarifies what has been validated without pretending that a visual model has become a technical approval set.
Floor Plan to 3D Online Questions People Ask Mid-Project
Can I convert a photographed paper sketch into a 3D house design?
Yes, if your selected platform accepts the prepared format and the sketch communicates usable geometry. Photograph it directly overhead under even light, crop carefully, preserve dimensions, and clarify walls and openings. Treat any model based on an unscaled sketch as conceptual until dependable measurements are applied.
How do I prepare a JPG or PNG for a 2D floor plan to 3D converter?
Keep the highest-resolution original, correct perspective, rotate the plan, and crop irrelevant surroundings. Check faint walls, door gaps, windows, stairs, and overlapping labels at high zoom. Avoid extreme contrast adjustments that merge nearby lines or erase thin architectural marks.
Can I turn a PDF floor plan into 3D without redrawing it?
Possibly, but first confirm that the product accepts your PDF and that its plan is legible. A PDF does not necessarily contain dimensions or editable geometry. If direct input is unsupported, export a clear reference image when appropriate, or reconstruct uncertain sections in a floor planner.
What should I do when my floor plan has no dimensions?
Do not invent scale from furniture symbols or visual familiarity. Search the original documents for a dependable measurement. Without one, build a proportional concept, flag it as unverified, and update the model when measured information becomes available. Professional verification remains necessary for technical use.
How can I check whether automatic wall detection worked correctly?
Compare the 3D shell against the source in a top-oriented view. Trace the exterior perimeter first, followed by internal partitions, junctions, wall thicknesses, and openings. Inspect every uncertain area identified before upload rather than judging accuracy from a furnished perspective view.
Should I furnish the model before checking doors and windows?
No. Validate the shell first because furniture can hide gaps, misplaced openings, and distorted proportions. Confirm walls, scale, levels, doors, windows, stairs, and circulation. Save that reviewed geometry as a separate version, then add finishes and furniture for presentation.
Can a converted 3D floor plan be used for construction?
A conceptual conversion should not be treated as architectural, structural, permit, code, or construction documentation. Use it to explore space and communicate design intent. Before building, engage the appropriate licensed professionals to verify dimensions, systems, compliance requirements, and project-specific documentation.
What is the best output for showing a client the design?
Choose according to the decision required. Use an editable model for collaborative changes, realistic renders for composed material and lighting views, or a walkthrough for communicating movement between rooms. In every case, validate geometry and label conceptual material clearly before sharing it.
Where should I start if my source plan is already clean?
Use the prepared file to convert 2D floor plan to 3D online with Zlendo Realty. Preserve the original, document your scale reference, inspect the generated shell, and select an editable, rendered, or walkthrough pathway only after the quality-control pass is complete.
Reshma Shree
A passionate content writer and digital marketer skilled in creating engaging, SEO-driven content that boosts online visibility and brand growth.