How to Draw Arc Walls for Curved Home Design in Zlendo Realty
A curved wall can give an entrance, living room or reading corner a different character from a rectangular layout. Planning that curve involves more than choosing a shape: you need to consider its endpoints, radius, connections and effect on the usable space.
Zlendo Realty’s Arc Wall tool lets you create curved wall segments in the 2D editor by setting a start point, an endpoint and the curvature. The documented workflow includes inward and outward curves, drawing measurements, snap assistance and editing after placement.
This guide follows the Drawing Arc Walls section of the official 2D Draw Mode documentation, with real Help Center screenshots.
What Is an Arc Wall?
An arc wall follows a curved path rather than a straight line. It can form part of a rounded room, an entrance feature or a transition between spaces.
Understand Convex and Concave Curves
The guide describes two drawing directions: a convex arc, which curves outward, and a concave arc, which curves inward.
Choose the direction in relation to your intended space. Review how the curve changes the room boundary and the route around it before finalizing the wall.
Choose Where a Curve Serves the Layout
Possible design uses include a curved living-room edge, a rounded entrance or a feature wall around a seating area. A curve should support the way the space works.
Check furniture placement and circulation early. A visually attractive wall can still leave awkward gaps or reduce the space available for storage.
Step 1: Open the Arc Wall Tool in 2D Draw Mode
Open your project in 2D Draw Mode and choose Build.
The guide gives the route Build Tool → Draw Walls → Arc Wall, or the keyboard shortcut H. The accompanying screenshot shows an Arc Wall button in the Build ribbon.
Identify the Correct Drawing Tool
Use Arc Wall when creating a curved wall. The separate Site Area → Arc option is for a curved plot boundary; it serves a different purpose.
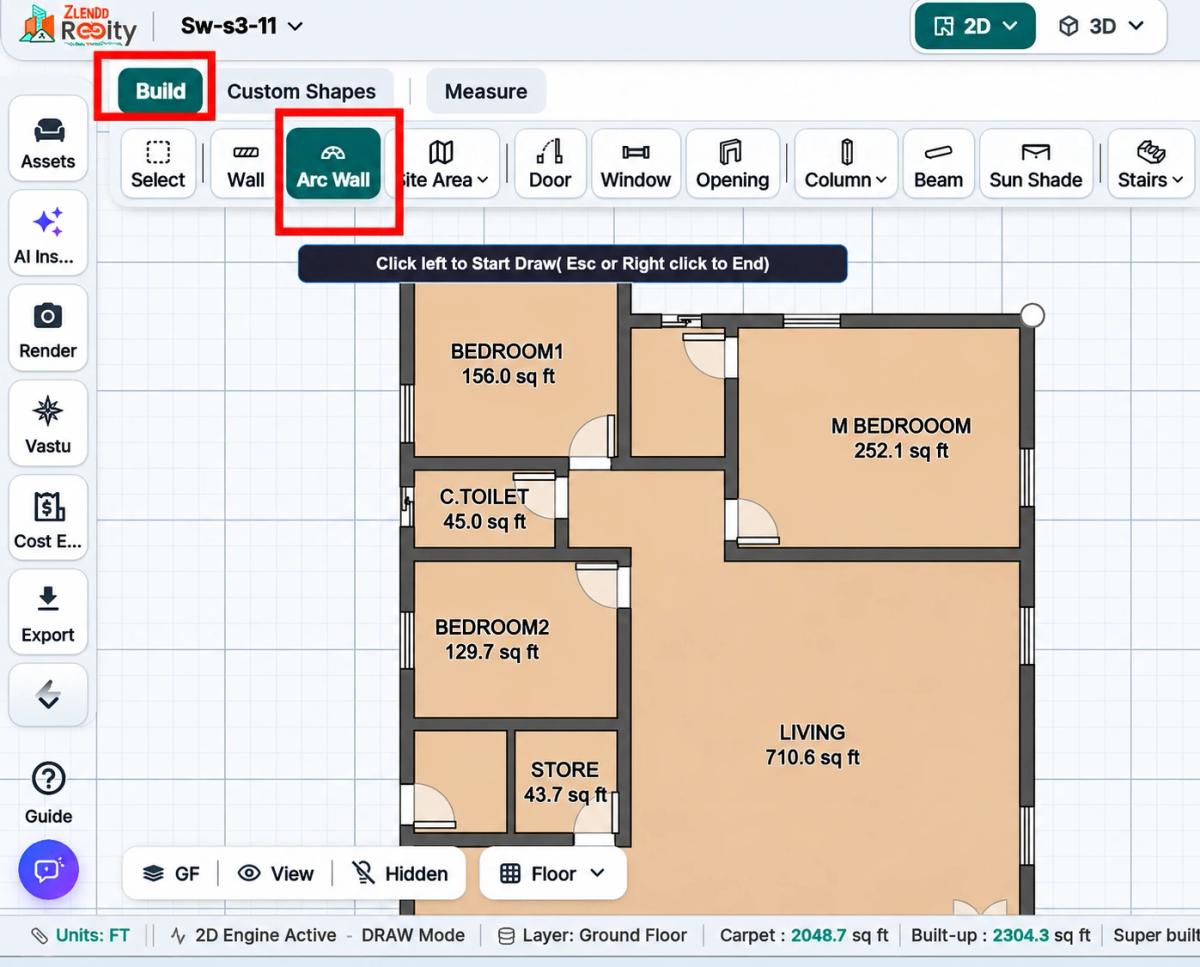
Official Help Center screenshot: opening the Arc Wall tool. Original Zlendo Realty branding is retained.
Follow the official Arc Wall instructions.
Step 2: Set the Start Point and Endpoint
With Arc Wall active:
- Click on the grid to set the starting point.
- Move the cursor and click to set the ending point.
- Move the cursor inward or outward to define the curvature.
- Click again to complete the arc wall.
Position the Endpoints Before Choosing the Curve
Decide where the wall should begin and finish. When connecting to an existing layout, look for the intended wall endpoints rather than estimating their locations visually.
Then adjust the curve to suit the space between those endpoints. The live preview helps you evaluate the shape before committing to placement.
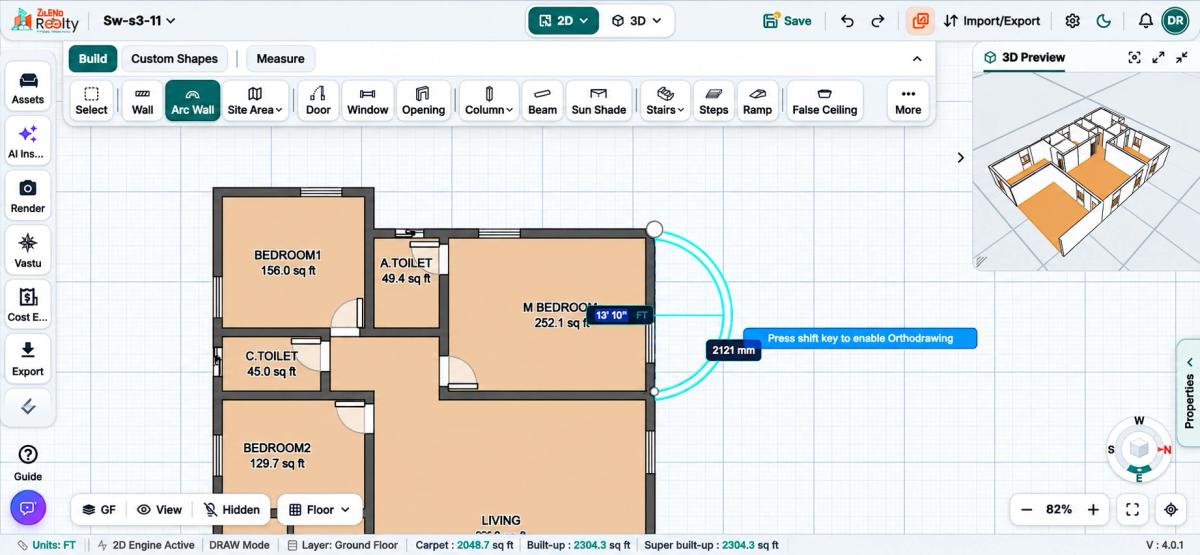
Official Help Center screenshot: a curved wall being drawn alongside an existing floor plan.
Step 3: Review Radius, Arc Length and Angle
The Help Center describes drawing assistance that includes a radius display, arc length measurement and angle indicator.
Understand What Each Measurement Describes
| Measurement | What it helps you review |
|---|---|
| Radius | The size of the circle underlying the arc |
| Arc length | The distance along the curved path |
| Sweep angle | The angular extent of the arc |
These values describe different aspects of the curve. Check which label you are reading rather than treating every displayed dimension as wall length.
Compare the Curve with the Surrounding Plan
Move the cursor to adjust the proposed curvature and watch the preview. Review the shape alongside nearby walls, furniture and circulation routes.
Confirm that the displayed units match your project settings. Use the measurements from your own design; the screenshot values belong to the documentation’s example project.
Step 4: Connect Arc Walls and Close the Room
After completing an arc segment, the guide describes continuing from its endpoint. Arc walls can connect with straight walls and other arc walls.
Use Snap Assistance at Connections
The documented snap types include:
- Endpoint Snap for wall start and end points.
- Midpoint Snap for the middle of a wall.
- Intersection Snap for intersections and corners.
- Tangent Snap to assist a smooth transition between an arc and a straight wall.
Watch for the relevant indicator as you connect segments. Zoom in when you need to inspect a junction more closely.
Return to the Starting Point
To form a closed room, draw the remaining wall segments and return to the starting point. The guide describes snapping and closing the shape to create the room.
Check that the boundary is actually closed before moving on. A curve that looks connected at a distant zoom level may still need closer inspection.
Step 5: Select and Edit the Curved Wall
You can revisit the wall after drawing it. The guide recommends selecting an arc wall to modify its radius or position and using Undo/Redo when needed.
Inspect the Selected Wall’s Properties
The official editing screenshot shows the selected arc, its contextual toolbar and a Wall Properties panel. Use the controls available for the selected object to review its settings.
After a change, check the wall’s connections and the surrounding room again. Moving or reshaping one segment can affect adjacent geometry.
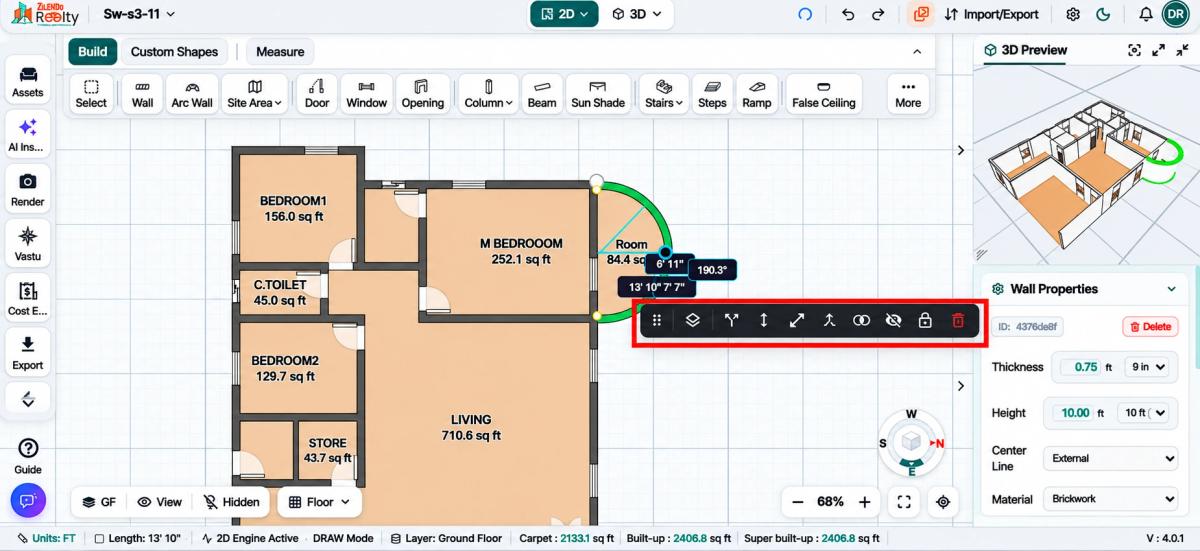
Official Help Center screenshot: a selected arc wall with editing controls and a 3D preview. This is a documented example, not a new product test performed for this article.
See the Arc Wall editing guidance.
Review Your Curved Wall from 2D to 3D
The 2D plan helps you inspect the curve’s geometry. A 3D view provides another perspective on its height, presence and relationship to nearby spaces.
The Help Center recommends checking a layout in both 2D and 3D. Its arc-wall example also shows a 3D preview beside the drawing.
Check the Space Around the Curve
Review the wall from several viewpoints. Consider seating clearance, door access, furniture placement and how the curve meets the ceiling or adjoining walls.
Explore Zlendo Realty’s 3D home design software for the broader visualization workflow. Use virtual home design to support discussion of the space alongside its measured plan.
Starting with an Existing Drawing?
The 2D to 3D floor plan workflow offers a route for working from a supported existing plan. Review the 2D to 3D converter page for current input requirements.
An imported plan needs its own geometry check. Do not assume that every curved line in an uploaded drawing will be recognized exactly as intended.
Curved-Wall Interior Ideas for Your Home
Once the wall geometry is established, explore finishes and furniture that work with its shape.
Develop a Reading Nook or Feature Wall
A curved partition can frame a chair or define a quieter corner within a larger living space. Keep access comfortable and choose furniture that leaves usable clearance.
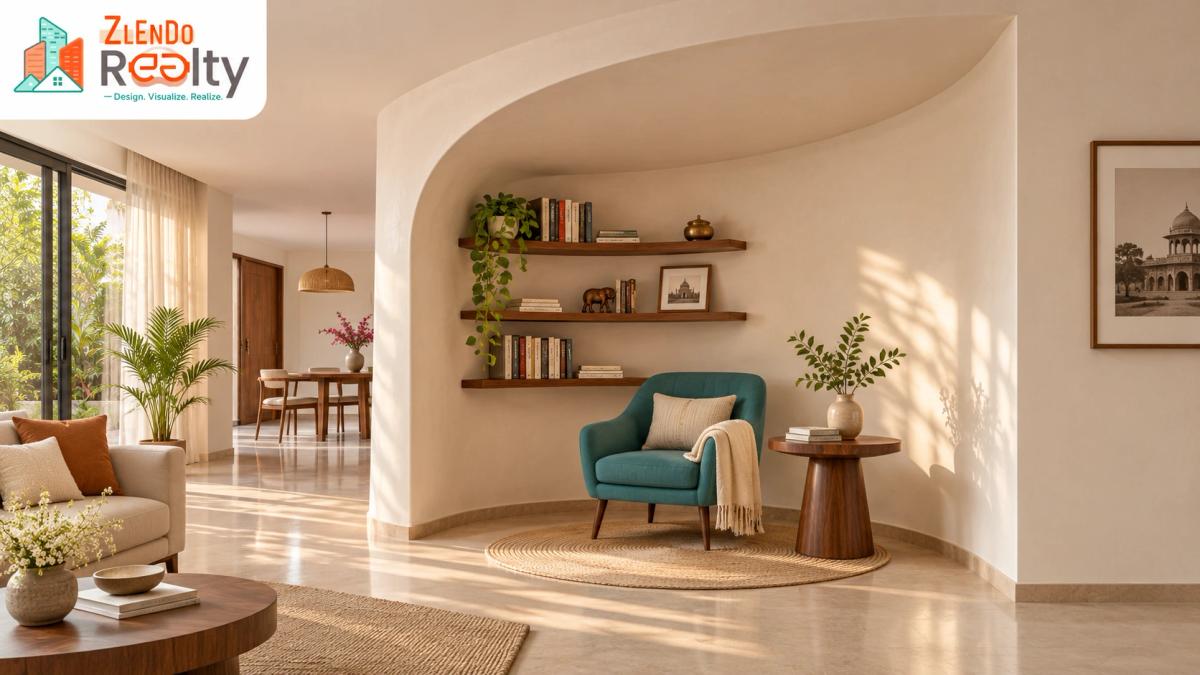
AI-generated design illustration. This image shows a possible styling direction; it is not a captured Zlendo Realty output.
Coordinate Styling with the Measured Layout
Explore AI home design and AI interior design options through Room Styler when developing a visual direction.
Keep your checked plan as the reference for dimensions. Styling concepts help communicate appearance, while the actual room geometry determines what fits.
Choose the Right Starting Point for Your Project
For drawing and refining the curve, explore Zlendo Realty’s floor plan design software. The AI floor plan design product page introduces the wider planning workflow.
If you are still deciding on an overall arrangement, review the AI floor plan generator page for Smart Wizard. The Arc Wall instructions here describe a manual editor operation; they do not establish that a generated layout will automatically include your preferred curve.
When evaluating AI home design software, match each tool to the decision you need to make: layout, wall geometry, styling or visual review.
Before You Finalize a Curved-Wall Concept
Check the endpoints, curvature, measurements, wall junctions and room closure. Then review the design in 3D and compare it with your furniture and circulation requirements.
A visual concept also needs project-specific review of materials, structural requirements and construction details before it is built.
Ready to explore a curved home layout? Visit Zlendo Realty and follow the official Drawing Arc Walls guide while working through your plan.
Frequently Asked Questions
How Do I Draw a Curved Wall in Zlendo Realty?
Open Arc Wall from the Build tools, or press H. Set a start point and endpoint, move the cursor to define the curvature, then click to complete the wall.
What Is the Shortcut for Arc Wall?
The official guide lists H as the shortcut for the Arc Wall tool.
Can I Draw Both Inward and Outward Curves?
Yes. The documentation describes concave and convex arc walls, with a live preview while drawing.
Can an Arc Wall Connect to a Straight Wall?
Yes. The guide describes connecting arc walls to straight walls and other arcs. Snap assistance helps with placement.
How Do I Create a Closed Room with a Curved Wall?
Continue drawing the remaining wall segments and return to the starting point. Check the completed boundary and its connections.
Can I Edit the Curve Later?
The guide states that you can select the arc wall to modify its radius or position. Review the adjoining geometry after editing.
Is Arc Wall the Same as Site Area Arc?
No. Arc Wall creates a curved wall; Site Area Arc creates a curved site-boundary segment.
Can I Review the Layout in 3D?
The guide recommends reviewing layouts in both 2D and 3D, and its arc-wall example includes a 3D preview.
Are the Tutorial Screenshots Real Product Images?
Yes. The three editor screenshots come from the official Help Center. The featured image and reading-nook scene are AI-generated illustrations.
Does a Curved-Wall Model Mean the Design Is Ready to Build?
A model supports planning and visualization. Construction still requires suitable drawings, specifications and professional review for the project.
Vishwas Govindarajan
GTM Head
A passionate content writer and digital marketer skilled in creating engaging, SEO-driven content that boosts online visibility and brand growth.